")
If you’re looking for a recipe for a beer that you can serve at a football-related event (whether it’s for a fantasy draft or just getting together with friends to watch the games on Sunday), look no further! I made this beer for my recent fantasy football draft party, and everyone seemed to love it. I’m sure it will go over just as well with your friends!
We just had our fantasy football draft party – and this year, I was the host. So, for this party, I came up with an awesome beer to have on tap just for the party.
It went over so well that we drank the whole keg at the draft!
This actually isn’t a recipe that I meticulously built from the ground up. It came together just by looking at what ingredients I already had on hand in my pantry and seeing what fit together.
And it all fit together very well!
When I saw that I had pilsner malt, German hops, and Lutra, I realized I could just add corn – in the form of grits – and I’d have a beer that was in-line with a style perfect for a football-themed party!
What Should You Expect From This Beer?
It’s probably obvious from the ingredients list, but this beer drinks like an American macro-lager (think Miller or Coors) or a pale Mexican lager (such as Modelo) – just with a lot more flavor.
It’s dry (mine fermented out to 1.006!) and very refreshing.
I happen to enjoy the corn flavor, and there’s a good amount of very light malt flavor.
Where I think this beer shines is in the hops. I’m a bit of a hophead, and I really like this combination of hops in a lager. There’s definitely a lot more hop flavor in this beer than something like Miller or Coors!
You’ll have to check out the video to get my full description of how the beer turned out.
Ingredients
These ingredients were all already in my pantry, fridge, or freezer – but I originally bought all of them on MoreBeer.com – except for the grits obviously, which I got at the grocery store!
I have provided links to each item over on MoreBeer.com for your convenience.
Note that the amounts specified here are for a 3 gallon batch of beer, since that’s the size I brewed up. I hope to update these recipe articles in the future to help you scale the numbers out to whatever size of batch that you’re planning, but in the meantime, the math should be pretty easy!
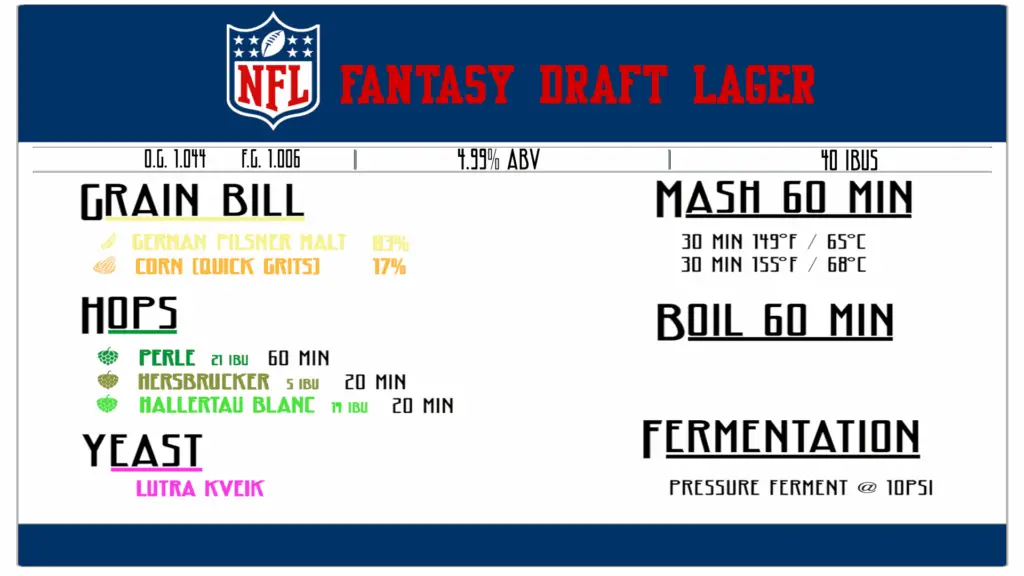
The Grain Bill
| Amount | Ingredient |
| 5lb | German Pilsner Malt |
| 1lb | Quick Grits |
I ended up with about 83% German Pilsner malt (Weyermann) and 17% corn just because it came out to even amounts in pounds for the batch size I was doing.
Honestly, if I were to scale this up to a 5 gallon batch, I’d probably just double the numbers above. The result would be a slightly lower O.G. (and slightly less alcohol content in the final beer) but I don’t think it would be enough to impact the flavor – and I think the convenience would outweigh any negatives!
Hop Additions
This recipe follows a pretty standard hop schedule with a 60 minute bittering hop addition and a 20 minute flavor/aroma hop addition.
| Time | Amount | Ingredient |
| 60 minutes | 18 grams (21 IBUs) | Perle |
| 20 minutes | 17 grams (5 IBUs) | Hersbrucker |
| 20 minutes | 17 grams (14 IBUs) | Hallertau Blanc |
| Total IBU: | 40 |
The hop profile for this recipe sort of centers around Hallertau Blanc, which has become my favorite hop for any kind of German-style lager recently.
This is an iteration on a hop schedule I’ve been playing with in recent batches (you may recognize it to an extent from other videos, like the Pils Cider in my recent cider video).
I find that Hallertau Blanc, despite the higher IBUs, is better used at the end of the boil as a flavor/aroma hop. Other hops with more of a spicy or woody character seem to add a depth and complexity that really makes the Hallertau Blanc flavor pop.
Yeast
| Amount | Ingredient |
| ½ packet | Lutra Kveik |
I pretty much always have Lutra on hand these days, so this was an easy choice for me. I already had an open half-packet in the fridge from a previous batch that I used.
How to Brew This NFL Fantasy Draft Lager
Here is the basic process for brewing this beer:
- 60 min Step Mash: 30 min at 149°F / 65°C followed by 30 min at 155°F / 68°C
- The Boil: 60 min boil.
- Chill the Wort & Pitch Yeast
- Fermentation: pressure ferment in a KegLand PET Oxebar Keg fermenter at 3 PSI until fermentation is complete and final gravity has been reached.
You can use very basic equipment with an inexpensive BIAB setup to brew this beer.
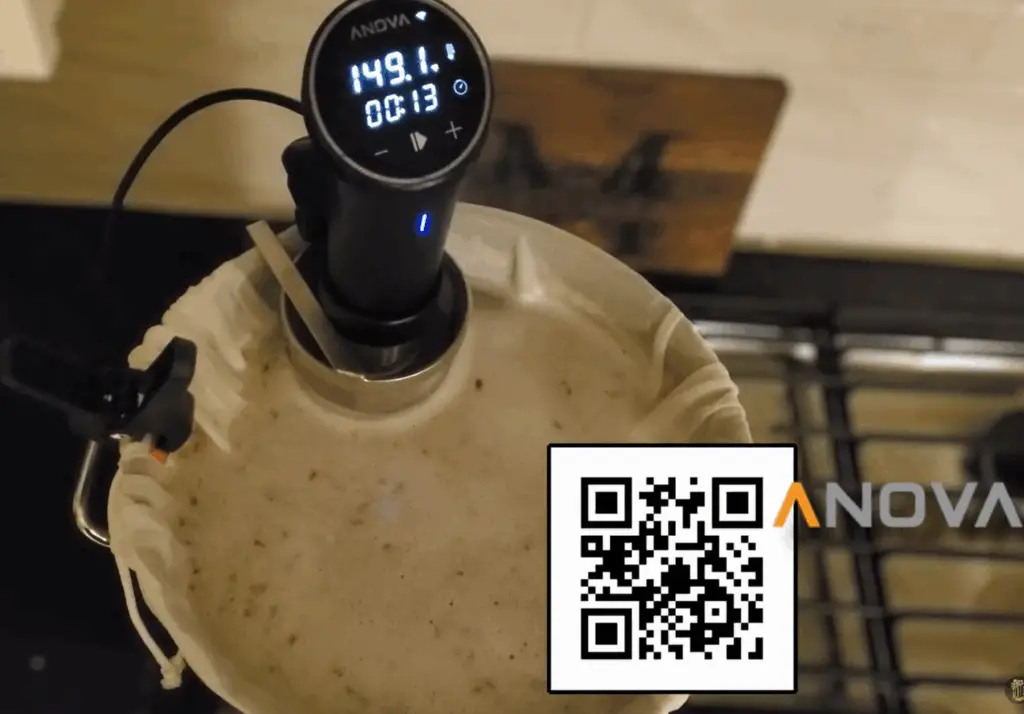
To achieve the precise temperatures required for this two-stage step mash, you may want to use a temperature controller. I like to use my Anova Sous Vide as a cheap alternative to one of those expensive, fancy all-in-one brewing systems.
The Mash
This recipe calls for a two-stage step mash at 149°F (65°C) for 30 minutes, followed by 155°F (68°C) for 30 minutes.
Add all of your grain to the mash at once. Mash the entire grist for the full 60 minutes.
If you use quick or instant grits like I did, or alternatively flaked corn from MoreBeer.com (or your LHBS), you don’t need to do a cereal mash.
As stated in the video, I didn’t exactly have full control over my schedule, so I opted for an overnight mash. I ended up doing the first stage of the step mash (149°F / 65°C) for a full 60 minutes, and the second stage (155°F / 68°C) overnight.
The recipe as I wrote it up calls for a 60 minute mash, however, so you can just do that. The overnight mash may have resulted in slightly more brewing efficiency and a slightly lower final gravity, but as Brulosophy determined, there are massively diminishing returns beyond 60 minutes and it’s almost unnoticeable in the final beer.
Alternatively, if you do not have access to a precision temperature controller like a sous vide, you can instead opt for a single-infusion mash at 155°F / 68°C or even 160°F / 71°C to ensure that the wort stays in the enzyme activity range for the full duration of the mash.
This will result in a bit of a sweeter beer.
The Boil
This recipe calls for a 60 minute boil, with a bittering hop addition of 21 IBUs worth of Perle at the 60-minute mark and a flavoring hop addition of both 5 IBUs of Hersbrucker and 14 IBUs of Hallertau Blanc at the 20-minute mark.
When the mash is complete, pull the grain bag, sparge as necessary (based on your system – I like to simply squeeze all of the wort out of the grain bag), and then crank the heat to get the wort to a rolling boil.
Once the wort is boiling hot, add your first addition of Perle directly into the wort. I like to use a hop spider.
For the 3 gallon batch that I made, and the bag of Perle that I used, this equates to 18 grams of hop pellets. You may need to adjust based on your batch size and the alpha acids of the Perle that you have on-hand – try to target 21 IBUs.
When 40 minutes have passed (and there is only 20 minutes left in the boil) you can add your flavor/aroma hop addition or both Hersbrucker and Hallertau Blanc. You can add them both at the same time.
For my batch size, and the specific hops that I have, this equated to equal additions of 17 grams for both hop varieties. Actually, that’s how I came upon these numbers – equal additions just made it easier.
When adjusting for what you have, you can target 5 IBUs of Hersbrucker and 14 IBUs of Hallertau Blanc.
To calculate your needs based on batch size and your hops’ alpha acid content, I find it best to use an app like BrewFather to do all of the heavy lifting for me.
Once you’ve added your 20-minute hop addition, let the wort boil for another 20 minutes to complete this step.
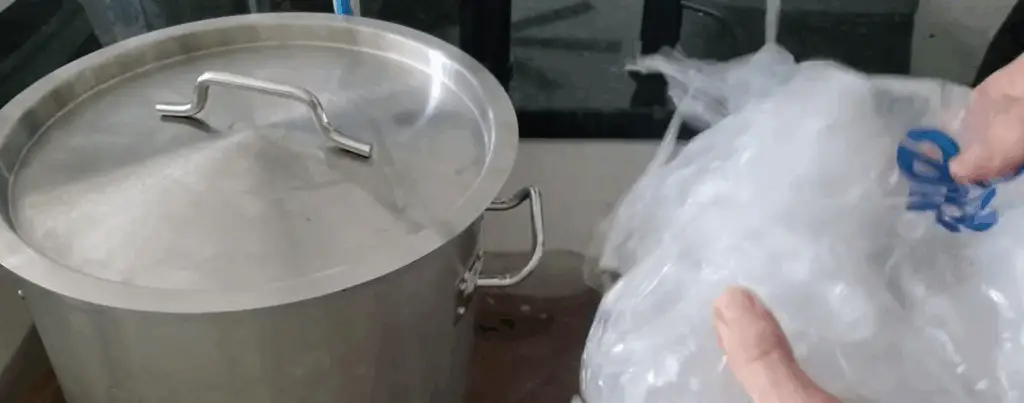
Chill the Wort
After boiling, chill the wort to 100°F / 37°C or lower as quickly as possible.
You must bring the temperature of the wort down from boiling to a safe range to pitch the yeast. Lutra kveik is a very hardy yeast and can withstand high temperatures, sometimes even above 100°F / 37°C!
However, it is very important to note that this is a very pale and relatively hoppy beer! While the wort remains above 180°F / 82°C, hop isomerization will continue – meaning your late stage hop additions will be converted to bitterness, resulting in higher IBUs, more bitterness in the beer, and less of that late-boil flavor and aroma we’re looking for.
So, once you cut the heat on the boil, it’s best to chill the wort under 180°F / 82°C as fast as possible. A proper wort chiller like this immersion chiller that I plan to buy soon would be ideal for quickly bringing the temperature down, but if you’re like me and don’t yet have a chiller, an ice bath in the kitchen sink works just fine.
Once the wort temperature is below 180°F / 82°C, you don’t have to worry as much anymore. I often let the temperature come down more casually over the next few hours until it is finally in yeast-pitching temperature range.
Anything in the 90s °F (around 32°C) is fair game with Lutra, but if you are using any other (non-kveik) yeast, you will likely want to let it drop even further.
Pitch the Yeast
Pitch the packet of Lutra Kveik dry yeast into the wort.
First, pour your wort from the brew kettle into your fermenting vessel and aerate it. You can knock out both of these things in one step by dumping the wort vigorously, sloshing it as much as possible as it goes into the fermenter.
Then, you can pitch your dry yeast into the wort. It is often advised that you rehydrate your dry yeast first; however, I rarely do. I pitch the dry yeast straight from the packet into the wort, and I have yet to see any issues with doing so.
For a 3 gallon batch, ½ of a packet of yeast is enough. Packets of dry yeast are supposed to have enough cells to happily get going on a 5 gallon batch, so scale your yeast pitching rate for your batch size based on that.
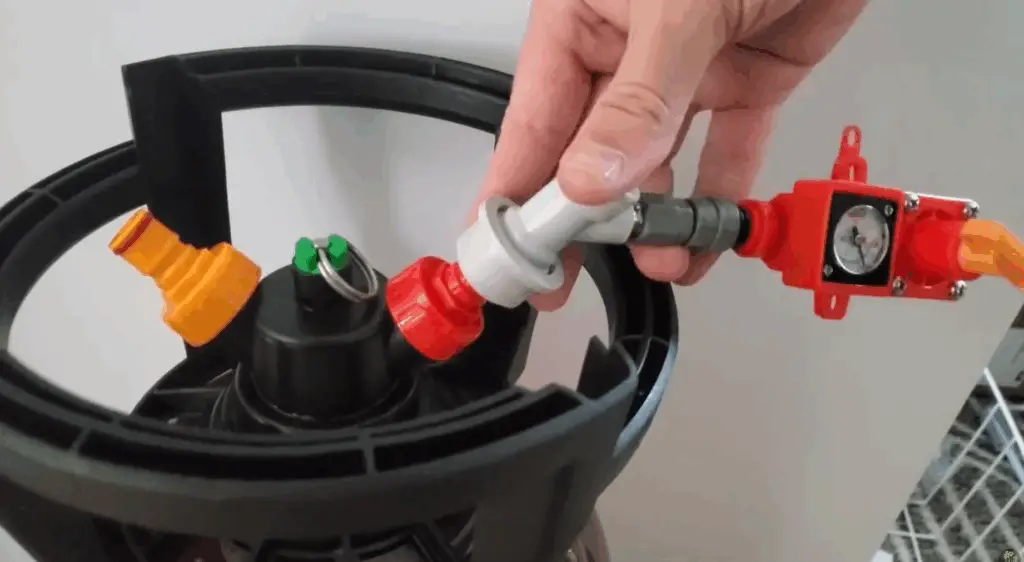
Fermentation
Keep your fermenter in a dark room, at room temperature, ideally pressurized at 3 PSI, until the yeast is finished fermenting.
For my batch, I used a KegLand PET Oxebar keg fermenter and a spunding valve to pressure ferment this beer at around 10 PSI. In hindsight, I think that wasn’t ideal, so I am adjusting this recipe after-the-fact to suggest 3 PSI instead.
Pressure fermentation is unnecessary with this beer (or any beer, really).
However, for something this pale and this clean, I do strongly suggest the use of a pressure fermenter, even if you don’t pressure ferment the beer.
A beer like this can often be more difficult than other recipes to get right, since any flaws will be very apparent. There’s nothing for off-flavors to hide behind in this beer, like there would be in a very malty dark beer or a very hoppy IPA.
If you can keep the fermentation vessel completely sealed from outside air, whether with a spunding valve or a standard airlock or blowoff tube, even through packaging, you can prevent oxidation and staling, which tend to be my biggest obstacles when it comes to making good beer.
The use of a pressure fermenter and a kegging setup allows you to do a closed, pressurized transfer at the end of fermentation – using inert CO2 to push the beer into the keg rather than letting gravity pull it through a siphon tube.
Fermentation with kveik strains like Lutra can be done in as little as a couple of days, but it’s best to give it more time – especially if you are using a PET fermenter and cannot easily get to the beer to check its gravity often.
I’m pretty sure my batch was done within a couple of days, but I let it sit for a couple of weeks just to be sure!
The beer should ferment out pretty dry thanks to the corn. My batch ended up super dry at 1.006, but results may vary based on your brewing setup, mashing times and temperatures, yeast pitching rate, and just whatever mood the universe seems to be in at that moment in time.
Packaging
When fermentation is complete, bottle or (ideally) keg your batch. Give it time to carbonate, then enjoy!
As stated above, the use of a keg system is ideal for this beer, but you can attempt to bottle-carbonate it if you’d like
Kegging, and a closed transfer from a pressure fermenter into the keg, helps to prevent any contact between the beer and the outside air, preventing oxidation and staling.
I’ll have more content (video as well as articles) in the future on closed transfers.
There are methods to quick-carbonate your kegs, but I never do that. A week or two in the keezer, hooked up to the CO2 tank, will get the beer plenty carbonated in time for the party!
Improvements
As stated, this recipe was not designed from the ground-up, it was sort of slapped together from ingredients that I had on hand.
These ingredients were very compatible, so it turned out great. However, if I were to brew this beer again, I’d make a few changes.
For one thing, I might play with the malt-to-corn ratio a bit. I think a higher percentage of corn in the grist might be good.
More importantly, however, I find that the hop character of this beer is a little soft for my liking. I think the beer would overall be much improved by swapping the Perle bittering addition for an equal amount (in terms of IBUs) of something a lot more bitey, like Saaz or Hallertau Mittelfruh.
Finally, I would have really liked to use a true lager yeast for this beer. Something like W-34/70 would be great, or alternatively, you could lean into either the American macrolager vibe with an American lager yeast or the Mexican lager vibe with a proper German lager yeast.
The use of true lager yeast, pressure fermented around 10 PSI, followed by a long lagering period, would result in a much crisper, more lager-y beer, and I think it would be a better beer for it.
However, while I did plan ahead a little bit, I didn’t exactly have months before the party for a long fermentation and an even longer lagering period.
Lutra kveik gets you about 80% of the way to a proper lager with about 20% of the effort and time, and in this case, that’s exactly what I needed, so I’m pretty happy with the results.
And everyone at the party seemed happy with it too!
Conclusion
This turned out to be an awesome beer, and it was perfect for our fantasy football draft party.
It was delicious, refreshing… and kind of ended up being fairly football-themed.
If you’re looking to brew up something for your own football-centric event, whether it’s a fantasy draft like ours, a tailgate, or something else – I can definitely suggest this recipe. I’m sure your friends will enjoy it just as much as mine did.