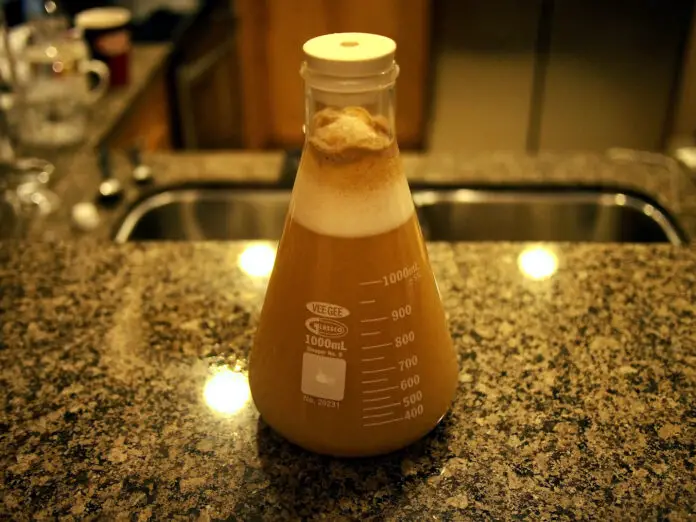
Given that dry yeast is so much easier to use, lasts for a very long time in storage, and works flawlessly, I always choose it over liquid yeast if I can – and these days, it seems you can get just about any yeast strain in dry form, so there’s not much of a reason to use liquid yeast most of the time! For this reason, I rarely need to build starters; when I do, it’s been so long that I have to look up what to do again!
Recently, I decided to look into yeast harvesting so I can store a culture of Lutra Kveik and reuse it for many future brews. Since I plan to overbuild a starter before pitching the next batch of pseudo-lager, I will need to make a starter. And this time, I figured I’d go ahead and document the process – not just for myself, but for anyone else who finds this page!
Additionally, in doing my research this time around, I’ve come across a bunch of more detailed information about yeast and yeast starters. In this article, we’ll just focus on how to do it, but keep an eye out for future articles about things like calculating the proper starter size, building starters for high gravity brews and more!
Do You Need to Build a Yeast Starter?
In modern day, where yeast manufacturers can produce far for viable yeast at a much cheaper cost, are yeast starters even necessary?
Honestly, they really aren’t – most of the time. That’s kind of the point that I made earlier. I very rarely even think about yeast starters these days, and when I do, it’s been so long that I need to look it up again.
The rules on when and why to build a yeast starter may warrant their own discussion in a separate article, but I’ll briefly touch on them here. If you’re unsure whether to build a starter or not, this should at least give you an idea.
If you are using dry yeast, you basically never need to use a starter. Dry yeast is far more dense than liquid in terms of active yeast cells, often containing upwards of 200 billion viable yeast cells. This is easily enough for any standard-gravity 5 gallon batch.
Dry yeast also stores easily. While liquid yeast and harvested yeast slants must be refrigerated and lose viability quickly, dry yeast packets can be tossed in a drawer and will keep close to 100% viability for a very long time.
The point is, if you’re using dry yeast, you don’t need to build a starter. There are benefits to rehydrating the yeast, but many homebrewers just pitch it into the brew straight from the packet.
Kveik yeast also tends to break all of the rules. This “super yeast” will produce a wonderful, clean fermentation even if you pitch from a very old, very low-viability slant, or if you don’t pitch enough yeast cells.
You can feel pretty safe pitching kveik yeast without a starter most of the time.
Additionally, in many cases you can get around building a starter by simply pitching more yeast. That’s the point of the starter anyways – to build up a bigger, healthier yeast culture.
If you’re not concerned with cost, and you just want to brew now, skip the starter and just pitch another package of yeast (or two!).
There are only a few instances where you actually need to build a starter.
- If you are pitching yeast from a previously harvested culture (yeast rinsing) or trying to overbuild a starter for storage and future use, then you probably have a smaller number of cells available and will need to build up your cell count with a starter.
- If you are using a very old yeast slant, or you have kept your liquid yeast in storage for a long time, there may not be very many viable yeast cells left. You probably want to use a starter to rebuild the yeast culture and ensure you have enough to actually ferment.
- If you are brewing an abnormally large batch or a high-gravity batch, you might want to even take extra steps (like a stepped starter) to bring your viable yeast cell count up even higher than normal. However, in this case, pitching extra packages of yeast may also be an option.
Here’s What You’ll Need to Build a Yeast Starter
You don’t need much in order to build a yeast starter – most of it, aside from the yeast itself, you probably already have in your kitchen!
I am going to provide links to some nice equipment in case you need it, but feel free to just use what you have.
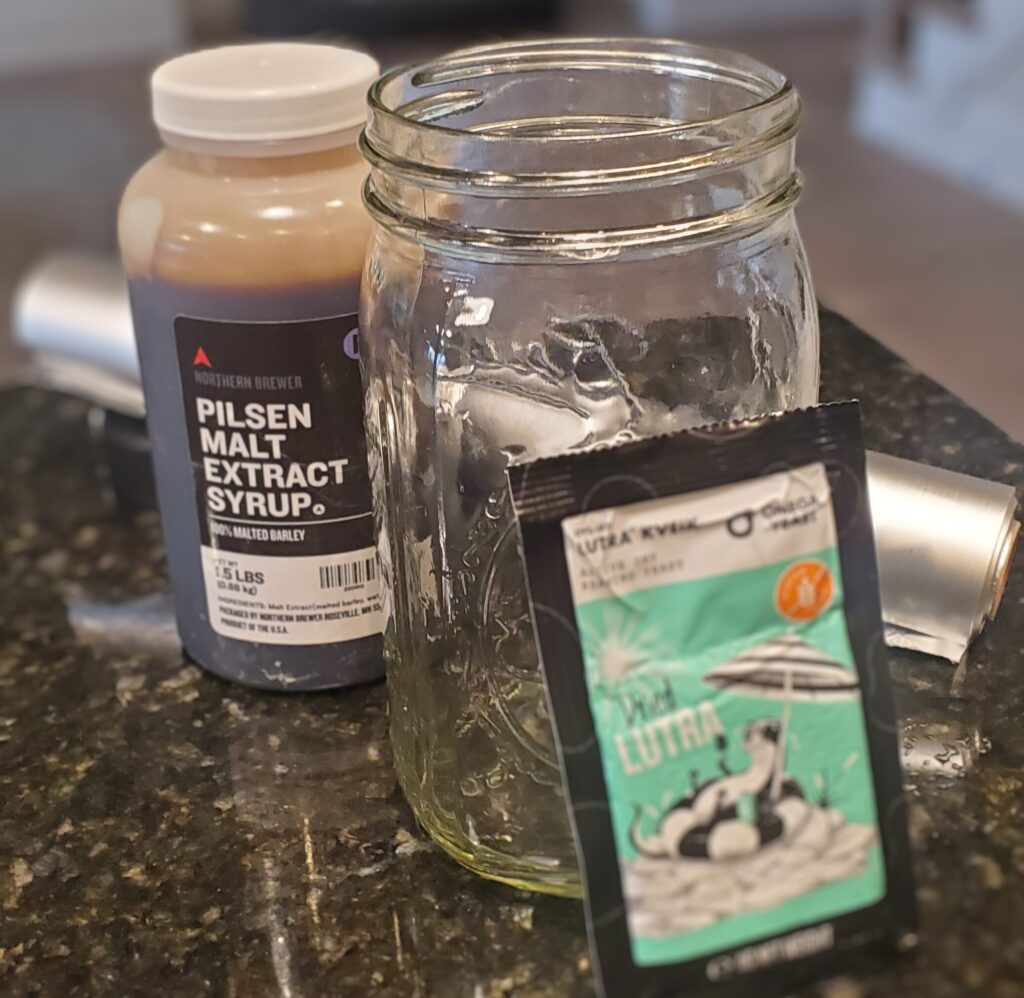
- Fermentable Sugar. Your yeast starter is basically a very low-gravity fermentation with different goals. You will need to produce a fermentable sugar solution (around 1.036 O.G.). There are benefits to using the same ingredients you will be brewing with (e.g. honey for a mead), which I will discuss further in the sections below. If in doubt, just use a neutral-flavored unhopped wort (you can use malt extract to make it easier).
- Yeast Nutrient. This is technically optional, but just as with a standard fermentation, it will give better results. It’s less optional if you are using honey or fruit for your starter – these solutions will not have as much nutrient as grain does, and the yeast will suffer.
- A glass jar of some sort. Many of the more “professional-looking” brewers (particularly the ones on Youtube) use Erlenmeyer flasks, which I have linked here. However, you absolutely do not need to use that – I use a mason jar, personally, with no issues.
- Aluminum foil or similar. You will need something to completely cover the container without sealing it. There are other options (such as placing the lid on the mason jar without screwing it on, if you are using that) but aluminum foil is easy and you probably already have some.
- Yeast. Of course, you need whichever yeast strain you will be using to build the starter (and later using to make a batch of homebrew).
- Sanitizer. I usually just leave this out, as it is implied that you pretty much always need sanitizer for homebrew, but it’s especially important when dealing with yeast starters. Without proper sanitization, you will contaminate your yeast culture before you even begin! I always recommend Star-San
- Stir Plate (optional). It’s commonly recommended to use a stir plate, but it’s not necessary – and it seems to me that it might not even be the best option. More information on this in the sections below – and this topic might even deserve its own article. However, I’ve added a link to a good one if you prefer to use it.
How to Build a Yeast Starter: the Step-by-Step Guide
When building your yeast starter, it is important to remember the goal: you’re trying to create enough clean, healthy yeast cells to ferment your batch under optimal conditions.
The primary focus should always be yeast health first and foremost, with actual growth being a secondary goal.
Many brewers mistakenly focus on just getting the right number of yeast cells at the expense of the health of their culture – which negatively impacts the batch even before it’s started!
Here, I will lay out the steps to produce a healthy, happy culture of yeast with a yeast starter for a standard-sized (5 gallons or less), standard-gravity (1.060 or less) batch of homebrew. For bigger batches or higher-gravity batches, you will likely need more yeast cells than this standard process will produce, and you may need to start with more yeast, used stepped starters, or one of many other processes to generate a big enough starter culture. All of these things deserve their own discussion – in another article.
Step 1: Sanitize Everything
Most of the time, I don’t mention sanitization or I only briefly touch on it. Sanitization is such a core part of brewing that it’s pretty much implied when it comes to anything you do involving fermentation.
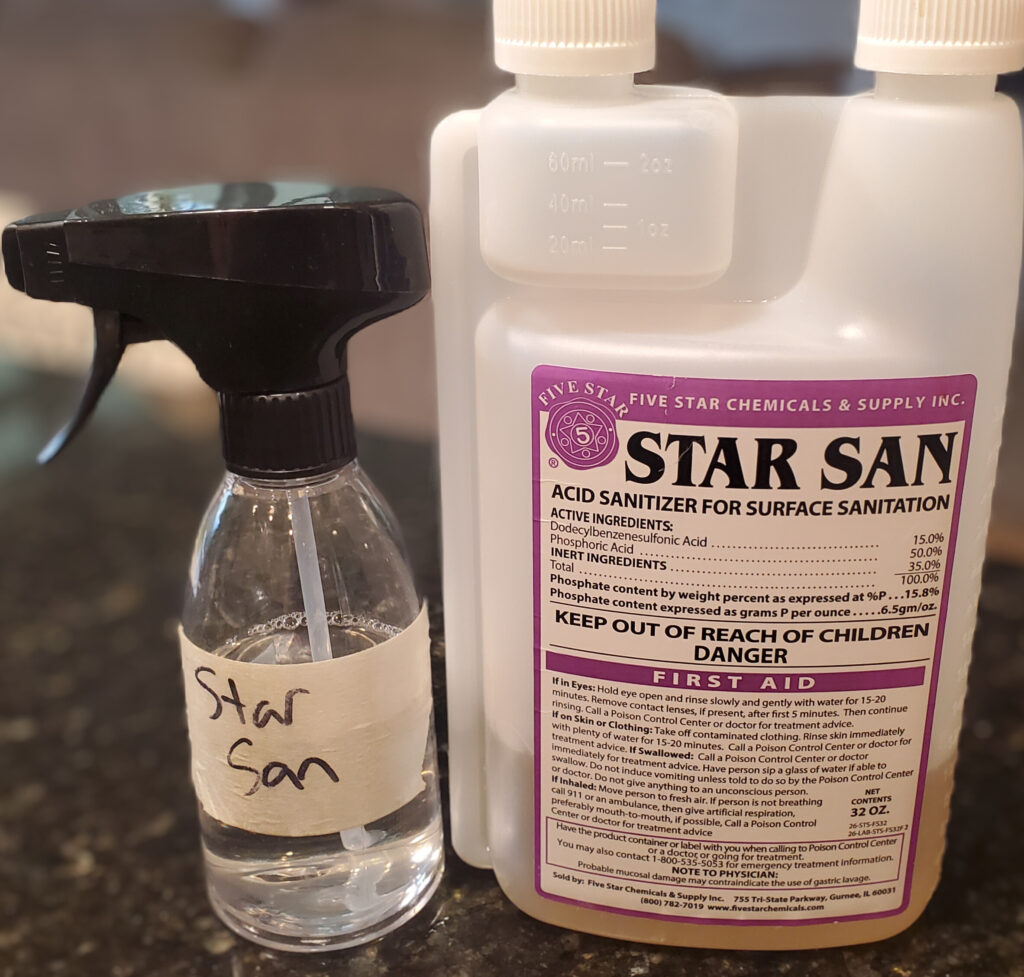
However, I feel that it’s extra important when it comes to building a yeast starter – so much that many resources state that if you are not confident in your sanitization practices, you might as well not build the starter in the first place.
You must ensure that everything that touches your starter wort/must or your yeast is sanitized. If you are not sure that your water source is sterile, you must boil it.
It’s so important because, when it comes to a yeast starter, you’re presumably starting off with a smaller/weaker culture of yeast, and the environment you’re pitching the culture into is not as antimicrobial as a real batch of brew – it’s not as easy for your yeast culture to outcompete other contaminants in the starter environment.
So you have to be extra careful with your sanitization.
But it’s not difficult or scary! Just be on top of it. Make sure everything that touches the starter solution is sanitized thoroughly in your sanitizing solution (I prefer Star San), and make sure your water is sterile (if you’re not sure, just boil it).
Step 2: Calculate Starter Size
In the past, I didn’t pay much attention to what my starter size should be. I would simply make a roughly 1.5L to 2L starter solution and toss a single packet of yeast in, and whatever came out of that was the yeast that I would use.
And honestly, that worked just fine. A lot of the “extra” things in homebrewing like this will make your brews better, but aren’t necessary. If you don’t have the patience or simply don’t care to determine “proper” starter size, just approximate it, and you’ll be fine.
However, during my research on overbuilding starters and yeast harvesting, I kind of went down the rabbit hole and really learned a lot about yeast culture cell count as it relates to batch size, recipe, and type of yeast. Different brews have different requirements, and your yeast starter is where you’re able to build up the yeast culture to meet those requirements.
Be on the lookout for an article in the very near future that explains exactly how to calculate your starter size!
The gist of it is to use a starter size calculator like the one in the BrewFather app. However, it does help to understand what goes into the calculation (even if you never intend to calculate it manually) and how to actually read the results.
And, of course, larger-than-normal and/or high-gravity batches need a much higher cell count than is easily attainable with a normal starter. To do it properly, you’ll want to do a bit extra – something like a stepped starter. More on this in a future article.
Step 3: Mix a Starter Solution of 1.036 Gravity Wort or Must
You’ll need a fermentable solution for the yeast to chew on in order for them to grow and reproduce. In fact, building a yeast starter is essentially the same thing as brewing up an actual batch of beer/mead/wine/etc – just with different goals. You’re not focused on drinkability here.
As stated above, the starter’s purpose is firstly to promote yeast health and secondly to grow your culture up to the required cell count (as calculated in the previous step).
While yeast can survive and function happily in environments with much higher gravities/alcohol content, they work best in a fairly low-gravity/alcohol environment. The lower, the better – to a point.
The sweet spot seems to be 1.030 to 1.040, with 1.036 being the target for your starter’s O.G. This will produce a pretty low-gravity brew once the starter is complete.
There are benefits to using the same types of sugar in the starter as in the actual wort or must the yeast will be pitched into. If you are producing a mead or wine, using honey or fruit juice can be beneficial. The yeast will acclimate to the environment in the starter solution, and when you pitch into the actual wort or must, they will be ready to dive right in and start working.
HOWEVER, you should NOT use honey or fruit juice if you ever intend to reuse this same yeast culture in the future.
If the yeast are exposed to an environment of only simple sugars, they will actually stop producing the enzyme that allows them to consume maltose. If you use a honey-based starter, and then use the yeast to ferment a beer, they will struggle and the product will be under-attenuated.
Basically, only use honey or fruit juice (or any other simple sugar) for your starter if and only if you know for a fact you will not be using this yeast culture beyond this specific batch.
If you’re overbuilding your starter or plan on harvesting the yeast later, use grain (wort). And if in doubt, and you don’t know what to do, just use grain (wort).
There are many ways to accomplish a grain-based starter, but the simplest by far is to simply use malt extract. You can use LME or DME, but I would suggest DME, simply because you can buy in relative bulk, store the excess, and reuse the same package of DME for many starters in the future. I also suggest something neutral-flavored like Pilsen or Pale malt extract.
You can also produce and can your own wort for later use, or just use some of the wort you produce in the mash on brew day (however, do be aware that the starter has to do its work for 24 to 48 hours after pitching).
Do not use hops. You are not producing a beer, you’re just producing a yeast culture.
Do boil it for a few minutes, however, even though you’re not doing a full 60-minute boil and adding hops. You will want to do this for the sterilization effect, anyways. Additionally, if you are using honey or fruit, and you aren’t sure the water is sterile, simply boil it to make sure.
Additionally, add yeast nutrient. Wort already has nutrients for the yeast in it, but it can still only help the yeast grow happily and healthily. You may need more nutrient if you are using simple sugars for the starter solution.
Step 4: Cool the Starter Solution to Between 68°F and 77°F
If you boiled your starter solution, you will need to cool it back to basically pitching temperature. You do not want to pitch your yeast into an environment that is too hot, or you’ll kill them!
Note that the desired temperature is 68°F to 77°F. This can change a bit depending on the specific yeast strain you use, but the point is that, unlike with a standard fermentation, you’re pitching the yeast into a solution near the top of their preferred temperature range.
Yeast produce a more drinkable end-product, with fewer off-flavor compounds, at the lower end of their preferred temperature range. However, they’re happiest and healthiest and reproduce the fastest at the top of that range. So that’s what we are targeting!
You can determine the exact range your yeast prefer from the packaging or the manufacturer’s website. If in doubt: lager yeast strains will be happier closer to 68°F and most other yeast strains will be happier at higher temperatures.
Step 5: Pitch Your Yeast Into the Starter Solution
If you haven’t yet, pour your starter solution into a clean, sanitized vessel of some sort. Many brewers use Erlenmeyer flasks for this, but something like a mason jar will work just fine.
Then, you can pitch your yeast! Nothing special about this, just dump the yeast in as you would with a standard batch of homebrew.
Step 6: Put Your Starter in a Cool, Dark Spot for 24 to 48 Hours
Most starters will reach their maximum cell density within 12 to 18 hours, but certain variables can increase that time – if your source of yeast is older or has a lower viability, or if the temperature isn’t optimal, it can take much more time for your starter to complete.
However, most of the growth should occur in the first 24 hours.
Additionally, if you give the yeast time to not only complete fermentation but to also settle out of the starter solution, you will ensure that the healthiest yeast make it into the actual batch for fermentation.
If you decant the solution off of the top of the yeast cake before pitching, and healthy yeast cells are still in suspension, you’re actually tossing out the most viable cells and keeping only the least-attenuating, most-flocculating ones! These cells are more likely to pass this trait on to any offspring, resulting in a yeast culture that has the potential for under-attenuation.
Obviously, if you plan to pitch at high krausen, this isn’t an issue.
Being patient and giving your yeast up to 48 hours to complete the process ensures that you produce the best yeast culture you can.
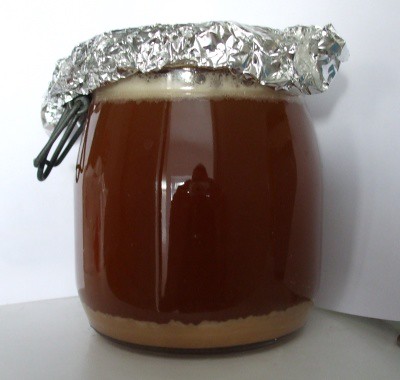
Note that you do not want to seal up the starter vessel or use an airlock! As discussed in the next step, it is very important that air is allowed to come into contact with the starter and provide oxygen to the yeast during growth.
However, you do not want to leave the vessel completely open to the environment – contaminants and actual bugs like flies can get in if you do. Leave the vessel closed but not sealed so that air can enter and exit but nothing else can.
This is easily done by simply placing a piece of aluminum foil over the top of the vessel. Crease it down over the edges so that it hangs off of the sides. Bacteria and wild yeast cannot crawl, so they will not be able to climb up the surface of the foil to get into the vessel.
Step 7: Use a Stir Plate (optional) or Shake the Starter Periodically
Your yeast starter is most effective when:
- CO2 is constantly released about as fast as it is produced by the yeast
- The yeast are kept in suspension and do not flocculate out into a sediment layer
- The yeast have enough access to reasonable amounts of O2
It has become commonplace amongst homebrewers to use a stir plate to achieve this. I don’t know where this idea started, but it has permeated homebrewing culture, particularly because it’s mentioned in many homebrewing books and you see so many “internet famous” homebrewers using it.
More recent observations have suggested that stir plates are actually quite detrimental to yeast health. There is evidence that the stir plate actually creates “shear stress” on the yeast, tearing the cells open and killing them.
An actual discussion on the topic would be better left to a separate article.
If you would like to use a stir plate, I have provided a link to a good one.
The alternative is to simply shake the starter vessel every so often. Make a point of shaking it every few hours to mix the yeast cake up into suspension and introduce oxygen from the air.
The one benefit of a stir plate, in my opinion, is the “set it and forget it” aspect. Once the starter is on the stir plate, you can leave it alone entirely until you are ready to pitch the yeast. You have to remember to actually go over and shake your starter otherwise.
A better option worth looking into is an O2 tank and a diffusion stone, which should produce better effect without harming the yeast.
Step 8: Pitch Your Yeast Culture Into Your Batch of Wort or Must!
Once your yeast is ready, and your brew day is complete, it is time to actually pitch your yeast.
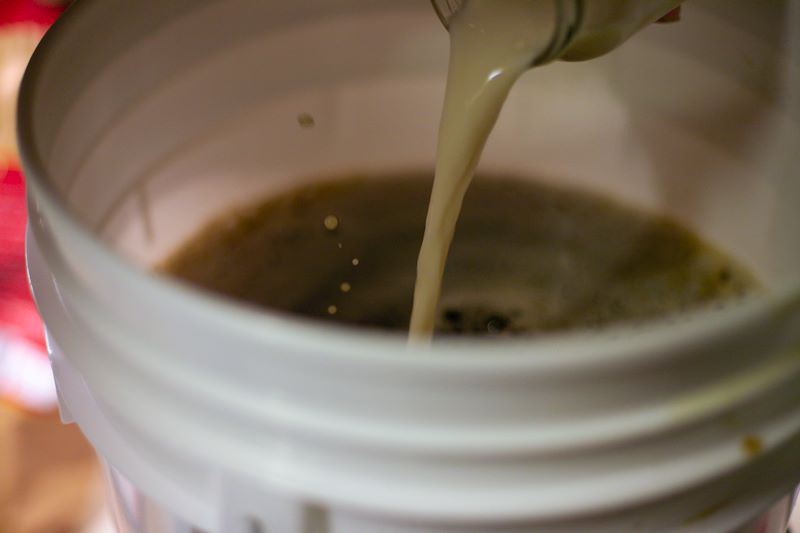
This is incredibly simple: just dump the yeast slurry from the starter vessel into the fermenting vessel!
However, there are a couple of additional things to consider.
The simplest way to do this is to decant the liquid off of the starter yeast and pitch only the yeast. This is beneficial because you are not watering down your actual brew with starter “beer” or “wine.” This starter solution is low-alcohol and most likely does not taste very good. After all, that’s not the goal, right?
By giving the yeast extra time after growth, you’re also allowing them to build up their glycogen reserves, which means they’ll be even healthier when the real fermentation begins.
To do this, you’ll want to give the starter some extra time – it has to first reach terminal gravity, and then you need to give the last of the yeast time to settle out of suspension. While letting them settle out, obviously you will not want to shake the vessel or disturb it in any way.
Decanting early means you’ll be getting rid of the healthiest, most attenuating yeast cells and pitching the ones that flocculate early, potentially resulting in an under-attenuated actual brew.
Alternatively, you can pitch the entire starter into your wort or must at high krausen, when the starter is foaming the most and the small fermentation going on inside is the most vigorous. This is hugely beneficial to your ultimate fermentation because the yeast are at their healthiest during this stage of the starter. It also reduces lag time during the real fermentation due to the yeast already being in the middle of active fermentation (you don’t have to wake them up again, like you would if you give them time to settle out).
However, the downside to this is that the starter solution must also get pitched into the batch. For smaller starters going into larger batches of brew, this may not be an issue – the flavor impact is negligible. However, as mentioned already, the starter probably doesn’t taste great – and it might not even be made from the same ingredients! This can have influence on the final product.
You can mitigate this by using higher-quality ingredients and taking steps to minimize off-flavors during the starter’s fermentation, but this can also ultimately impact yeast health.
There are pros and cons to each method, and in the end it is up to you what you prefer.
I personally decant the liquid and pitch just the yeast. You might make small sacrifices in terms of initial yeast activity and lag time, but in my mind it is worth it to ensure the end product is the best it can be.
Conclusion
Building a yeast starter isn’t very complicated, but you do need to take care that you’re sanitizing everything thoroughly and keeping your starter fermentation under control to best take care of your yeast.
Remember, the goal of a yeast starter is primarily yeast health and only secondarily yeast growth.
Next time you need to build a yeast starter, follow these steps and you should be able to successfully build up a culture of happy, healthy, viable yeast, ready for pitching!

