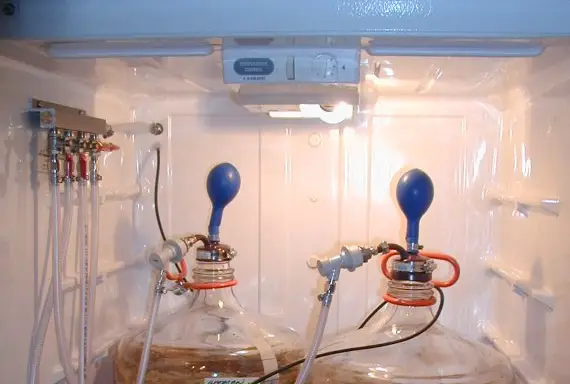
If you’ve ever cold-crashed your beer, mead, or wine in the pursuit of clarity, you’ve probably experienced this. You might not have even realized it’s happened, only that the batch didn’t turn out like you had hoped. I just brewed a batch of beer a few days ago, and it got me thinking about (and researching) what I’ll do when it’s ready for kegging: how do I cold crash this beer without dealing with the harmful effects of suckback?
The only way to safely cold-crash beer, mead, or wine when homebrewing, and prevent suckback, is by using a pressurized vessel. This usually implies expensive equipment or kegs, however, there are a few more cost-effective and DIY options to approximate a viable solution.
The results of my research both disappointed me and gave me hope.
I was expecting to learn about some sort of technique or special process that would solve all of my problems… What I learned instead is that the only real solution is special equipment.
However, that doesn’t mean you need to lose all hope. It’s not all about buying expensive pressure-ready fermenters and elaborate kegging setups.
There are cheaper products on the market now that can help solve this problem – like the Cold Crash Guardian, which I’ll comment on later in the article (and no, this isn’t a sales pitch, I don’t even get any kickbacks or commissions from them).
Plus, I was able to discover some neat DIY solutions that other homebrewers have come up with to approximate a solution – if not outright solve – the problem themselves.
In the next two sections, What is Suckback? and Why Do You Want to Cold Crash, Anyways? I’m going to give some details about the problem. If you already know this, or are otherwise not interested, and just want to know how to solve the suckback problem, feel free to skip right on down to the last section, Methods to Prevent or Mitigate Suckback.
What is Suckback, and Why’s It So Bad?
In the simplest of terms, suckback is exactly what it sounds like: when you chill your brew down to lower temperatures inside the fermenting vessel, it will attempt to suck air in instead of pushing it out.
If something is blocking it from sucking air in, such as the Star-San in an airlock, it will suck that in instead.
Alternatively, if you seal the vessel completely and prevent it from being able to suck in anything, it will attempt to suck in the vessel itself (or rather, the walls), which can lead to a collapsed or broken fermenter.
In more scientific terms, this is the basic nature of changing from higher temperatures to lower temperatures. As the temperature drops, the molecular bonds of a substance condense, causing the substance to take up less space. This doesn’t affect solids (the fermenting vessel) as much as it does liquids and gasses (the contents of the vessel).
So, once the liquid and gas inside the vessel is taking up less space, it creates a vacuum. Something needs to fill that now-empty space.
The results of this can be as mundane as creating off-flavors, or as catastrophic as completely destroying your fermenting vessel and getting your brew all over the place in the process.
1. It Can Suck the Contents of Your Airlock Into Your Brew
If you are using an airlock or blowoff tube, when the vacuum occurs and your vessel attempts to suck in air through the bunghole, it may instead pull in the liquid sitting in your airlock first.
Usually, you’re probably using Star-San or some sort of high-alcohol liquor like vodka. This would ensure sanitization while also being relatively food-safe. Ingesting a little bit of Star-San is not bad for you (that’s the whole reason for using it over some other cleaning product in the first place) and obviously vodka is fine.
But do you really want to affect your batch with that stuff? I’m all for Not Fearing the Foam, but I also wouldn’t want to dump an entire airlock’s worth (or a jar-full, if using a blowoff tube!) of Star-San into my brew (especially with smaller batches).
And what about all of the dead flies, debris, and other gunk in there? Your airlock gets pretty gross after a few days or weeks of fermentation, especially if it was a vigorous one and blew off a bunch of krausen or fruit solids.
Plus, I like to do what I can to minimize doing things that will alter the flavor of my brew – or at least, make deliberate decisions on what’s going to do that.
Even if you don’t care about some Star-San getting into your brew: suckback does have the potential to draw in all of the liquid in the airlock, leaving your brew exposed to the air. If it does that, it probably sucks in some of that air in the process as well.
Some airlocks are actually designed to prevent or minimize suckback of liquid in the device (the S-Shaped ones in particular), and you’ll hear some brewers tout that they don’t get any suckback with these airlocks. However, this doesn’t mean suckback isn’t occurring – just that, instead of some Star-San getting sucked in, the airlock is letting air flow almost freely through!
Which brings me to the next issue….
2. It Can Suck Ambient Air (Oxygen) Into Your Brew
If nothing is blocking it (or if the suckback is able to suck in whatever was blocking it, like the liquid in an airlock or a solid bung) then suckback can result in the ambient air outside of your vessel getting sucked into the brew.
This creates contamination concerns, but more importantly, it has oxidation concerns.
To read about the effects of oxygen on your brew both pre- and post-fermentation, go check out this article. Spoiler: it’s not good once the yeast are done with their job!
Read about preventing oxidation in this other article!
How is this different from any other time the batch gets exposed to air? As homebrewers, we generally have to do our best to limit or mitigate oxygen exposure, since without fancy expensive equipment (like pressure-ready vessels that allow pressurized closed transfer of liquid) we have to open the vessel up every now and then – during racking, for example.
As it turns out, it’s very different. Most of the time, when opening the vessel at room temperature, you are doing it for a very limited amount of time. If you’re doing it right, you’re doing whatever process you need the vessel open for (racking, for instance) quickly, and then sealing it up right away.
Additionally, you have the benefit of that CO2 blanket in the headspace of the vessel, protecting the liquid from outside air. Just how much the CO2 protects the brew is hotly debated, and would require a separate article to discuss in full, but at the very least, the outward pressure of the CO2 in solution and in the headspace will push away the ambient air, at least temporarily, while the vessel is opened.
During cold crashing, not only is this not the case – the air behaves in the complete opposite way! This means it’s far worse than just opening your vessel normally!
First of all, the cold temperatures prompt the CO2 in the headspace to get pushed into the liquid, dissolving into solution and at least partially carbonating it (depending on the amount of CO2 available). We tend to drink carbonated beverages cold for this reason. You may have noticed this, actually: soda, beer, etc. tends to be much foamier/fizzier and does not stay carbonated very long at room temperature, but stays carbonated for quite a bit if you chill it in the refrigerator first.
Second, the act of sucking in the air that happens as a result of suckback actually forces contact between the air and liquid. CO2 in the headspace is not exerting outward pressure, because the vacuum effect causes the pressure to change direction, forcing it inward.
As a result, far more contact with oxygen occurs far more quickly due to cold crashing and suckback unless something acts to keep that air out.
3. It Can Cause Your Fermenting Vessel to Implode
Completely sealing up your fermenting vessel before cold crashing sounds like a good idea, because it would prevent the above issues from happening, right?
While it would prevent suckback from occurring and sucking in either airlock liquids or ambient air, the vacuum is still created, and negative pressure is still exerted.
Something has to be sucked in. And this often ends up being the fermenting vessel itself!
If the vessel is completely sealed, the negative pressure will attempt to suck in the walls of the vessel. This can be dangerous, disastrous, and messy!
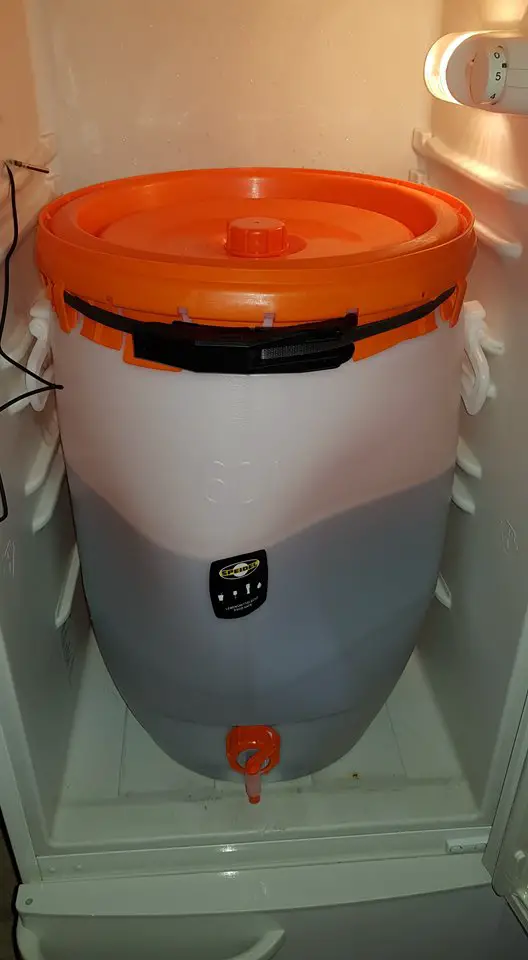
Oftentimes, a plastic vessel will cave in, but it will hold up and there won’t be any permanent damage. You’ll be able to pop the sides back out after racking and reuse it.
However, that’s not always the case. Sometimes creases will form, and the plastic will never return to its normal shape.
It may even crack open, ruining the vessel forever, and spilling your brew all over the refrigerator!
Glass and steel fermenting vessels can be even more dangerous. While glass might seem more solid and hold up under pressure sometimes, when it does fail, it shatters, spilling not just your brew everywhere, but also dangerous glass shards that can really hurt you.
Stainless steel vessels are often rated for pressure, which causes brewers to think they can withstand a cold crash. However, many have tried, and have been proven wrong. Positive pressure is different from negative pressure, and just because your vessel is pressure-ready, it may not be able to withstand a vacuum.
Stainless steel can implode. Once it does, it isn’t as simple as just popping out the sides again; the vessel may be ruined permanently.
Why Do You Want to Cold Crash, Anyways?
So, given that cold crashing can actually cause a bunch of negative things to happen to your brew (and possibly your equipment), why do it anyways? What are the actual benefits?
Cold crashing your beer, mead, or wine, when done right, can improve the quality of the final product. The cold temperature will put the yeast to sleep, causing them to flocculate more effectively and drop out of solution. Other solid particles (proteins, hop matter, fruit bits) will also become denser and settle to the bottom as well. Thanks to the cold, the yeast cake will become more solid and compact, and less likely to swirl up into solution if you disturb it.
Furthermore, if you ever want to create a true lager, the batch will need to spend some time lagering at a low temperature after primary fermentation.
Of course, I have probably done more batches where I didn’t cold crash, and they turned out great. Many were even very clear!
Patience is a big part of that. Most of my clearest brews were meads, which often need to age for a much longer period of time than something like beer. That time allows yeast to settle out naturally (especially if the batch is racked to a second or even third vessel over the course of aging).
However, most people just don’t have that kind of patience, especially when they expect their beer to be done in a few days or weeks!
Plus, I’m always looking for better ways to create a beer, mead, or wine that doesn’t have yeast floating in it. I don’t like the taste of yeast in my drink.
So if there’s a way to safely and effectively cold crash, I’m all for it!
Methods to Prevent or Mitigate Suckback
And so we get to the meat of the article. This is what you’re here for. So how, when cold crashing, do you prevent or mitigate suckback in a safe and effective way?
Unfortunately, the results of my research show that the only real way to prevent suckback is with a pressurized system – using pressure within the system to cancel out the vacuum effect.
But don’t get too down about it! As I said at the start of the article, learning this did disappoint me – but some of the things I’ve seen out there to mitigate or solve the problem give me hope!
So, here are the various solutions – of varying complexity, effectiveness, and cost – to help you cold crash your beer, mead, or wine without creating suckback.
1. Cold Crash in a Pressurized Vessel: Pressure-Ready Fermenters and Kegs
The ideal solution is to ferment in a pressure-ready fermenting vessel, such as Spike’s Flex or Conical, or the FermZilla All-Rounder. You do not need to actually ferment under pressure, you just need to cold-crash under pressure.
When you’re ready to cold crash, hook your fermenter up to your CO2 tank and set the pressure. As the temperature drops in the vessel, and everything contracts, it will safely draw in CO2 from the tank rather than sucking in ambient air or, worse, imploding the vessel.
It’s VERY important to note: just because your fermenter is pressure–ready does not mean it can withstand vacuum! You should never cold crash your pressure-ready vessel without pressurizing it first! Pressure-ready fermenters are rated for positive pressure, not negative pressure.
Many brewers, both in home and commercially, have made this assumption and paid the price for it in lost beer, mead or wine as well as destroying their (very expensive) equipment.
The alternative to using an expensive pressurized fermenter is to simply cold crash in a keg. You might be thinking, though, that this is not any different from simply kegging normally, and… well, you’d be right.
Kegging directly does not have the advantages provided by cold crashing first. Specifically: the point of cold crashing first is to be able to then transfer the liquid away from the yeast cake for clearer, cleaner-tasting results. Simply kegging and then refrigerating the keg leaves the yeast cake inside.
This isn’t the worst thing, however; you can simply dump the first few pours, which will be nothing but yeast. Alternatively, there are options like floating dip tubes that help you to get around the issue almost entirely.
If you have multiple free kegs, one option is to first transfer to your “cold crashing” keg, which you will use, of course, for cold crashing, and then transfer off of the yeast cake and into the second keg for serving.
When doing multiple transfers like this, you should be careful. Every racking creates a new opportunity for contamination and exposure to oxygen. If you plan on doing this, your best bet is to use pressurized transfers to ensure the batch is never exposed to air.
2. Use the “Balloon Method”
One very interesting solution that I found on forums when researching this topic is the “balloon method.”
This method approximates what a pressurized container does – using added CO2 to cancel out the vacuum effect.
In theory, if done perfectly, this method should work just fine. Unfortunately, it seems a bit difficult to pull off effectively.
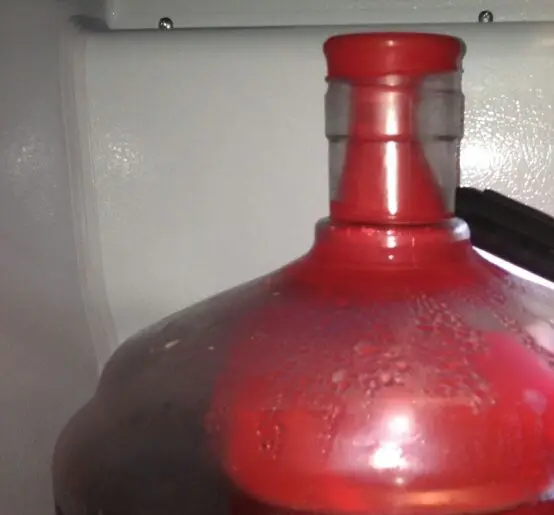
To perform the balloon method, you simply need to replace your airlock with a balloon full of CO2. You can fill the balloon with CO2 from a tank, but most of those who are attempting this do not yet have a kegging setup.
Instead, you can simply try to time it, and attach the balloon just at the end of fermentation. The balloon will fill up with CO2 that is let off by the fermentation process.
With the CO2-filled balloon firmly attached to the fermenting vessel at the bunghole, put it in the refrigerator for cold crashing. As the temperature drops, the vessel will suck in CO2 from the balloon rather than ambient air.
This is an incredibly cheap method to approximate a pressurized system. It requires only a balloon, which can be purchased at the grocery store.
However, it’s not without its downsides – and it’s got a lot of them.
Most obviously, the need for timing: how are you going to know when your fermentation is in that perfect moment when it is ready for you to attach the balloon? Too early, and your balloon will become overfilled with gas, either forcibly detaching from the vessel or popping. Too late, and you won’t be able to fill it with enough gas to cancel out the vacuum effect – the balloon will instead be sucked in.
If the suckback is strong enough, and the balloon is attached well enough, it will create a sealed system and the vessel can implode.
That’s not to mention the difficulty of attaching a balloon full of CO2 to the bunghole of your vessel without losing too much of the gas. From what I’ve seen, brewers usually tie the balloon to the bunghole or use a rubber band. I imagine, with something like a carboy, you could affix the balloon to the bung and then push the bung into the hole.
If you can get everything right, though, in theory this should work perfectly and result in a safe cold crash with zero suckback.
3. Don’t Cold Crash At All
If you don’t have the means to cold crash safely and effectively, it might not be worth doing at all.
Cold crashing provides a ton of value in terms of quickly clarifying your brew and dropping most of the yeast out of suspension before transferring to a new container, bottle, or keg. But there are other ways to achieve this without the danger of ruining your batch or your equipment.
Patience, for one thing, is a great tool for homebrewers to have. While I do understand the excitement and wanting to enjoy the fruits of your labor as soon as you can, your brew will only get better with age.
It took me a while to learn this, so I do truly understand. When I was first starting, I couldn’t wait. I probably rushed my first few beers and drank them too soon. Some were definitely cloudy and undercarbonated!
However, as I’ve gotten older, I’ve realized the value of patience. If I can just wait a few more days or weeks, the batch will only get better. Yeast will flocculate on their own eventually, producing a clearer and cleaner-tasting end product – not to mention all of the other great things that come with aging your brew (like mellowing of bad flavors, melding of good flavors, etc.)!
And if you don’t want to have patience… there’s nothing wrong with a cloudy drink. It’ll still taste just fine!
If you cannot pressurize your vessel during the cold crash, and you don’t want to try the balloon method (or the other DIY solutions I’ll describe below), I’d strongly suggest just not worrying about it at all.
4. The Cold Crash Guardian
This is where it gets interesting. During my research, I stumbled upon this product – someone clearly heard about the balloon method, and thought, “I can make that better and easier, and then sell it!”
(By the way, as I’ve said already: this article is NOT a pitch for the product. As far as I can tell, this company doesn’t have an affiliate program, so I don’t get anything if you buy it. I just really like the idea!)
Here is the link to buy the Cold Crash Guardian. Again, I don’t get anything if you buy it, but it wouldn’t be right to talk it up and then not provide a link.
The device is a simple bladder attached to some beer tube with some valves and pressure regulators.
Here’s how it works: you attach the line to your bung or airlock hole, just as you would with a blowoff tube. The other end of the line goes into a jar or other vessel with some liquid like Star-San – again, I’m basically describing a blowoff tube.
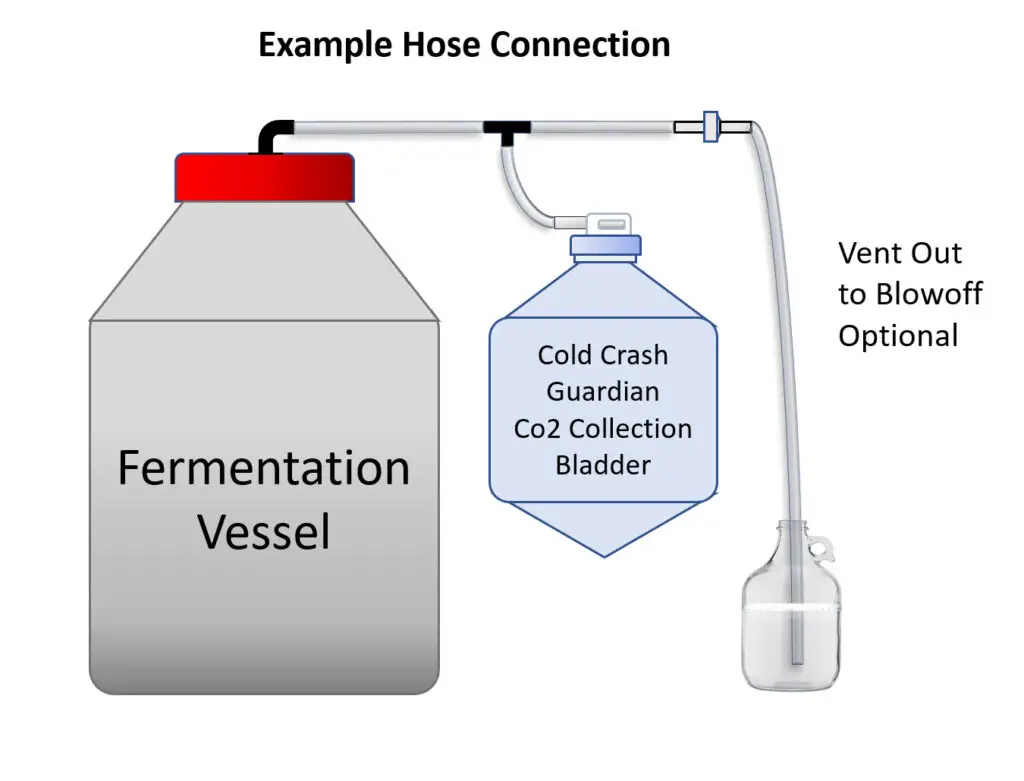
But what makes it interesting is that the bladder is attached by a valve and pressure regulator halfway up the tube. CO2 is allowed to fill the bladder until it is full, and after that, the rest of the gas is vented through the blowoff tube as usual. The bladder remains full of gas until you’re ready to cold crash.
When cold crashing, you just put the fermenting vessel, bladder and all, into the refrigerator or cooling chamber. Gas will be sucked in from the bladder instead of the outside air!
What this means is that, unlike the balloon method, you don’t have to worry about timing! You can add the Cold Crash Guardian at the beginning of fermentation, or any stage thereafter (they suggest waiting until krausen dies down, just so you don’t get any liquid or solids in the bladder that you would need to clean later).
Additionally, you can simply ferment as normal (with a standard blowoff tube, airlock, or similar) and then fill the bladder with CO2 from a tank at the time of cold crashing.
It is nearly $20 at the time of writing this, which may be off putting for some homebrewers who are trying to enjoy the hobby as cheaply as possible, but I’d say that seems like pretty fair value for a buy-it-once-use-it-forever kind of a product.
To me, this product sounds fantastic, and seems like a perfect solution to the suckback issue. However, take that with a grain of salt (for now) as I have not yet used it.
I WILL be buying one and using it with the batch of IPA that I have fermenting away upstairs currently. I’ll let you know my thoughts on the product in the coming weeks, as soon as I have more information for you!
5. Homemade and DIY Solutions
I’ve seen several examples online of homebrewers approximating the balloon method or Cold Crash Guardian with their own DIY setups – many of which seem very easy to make with minimal tools or know-how!
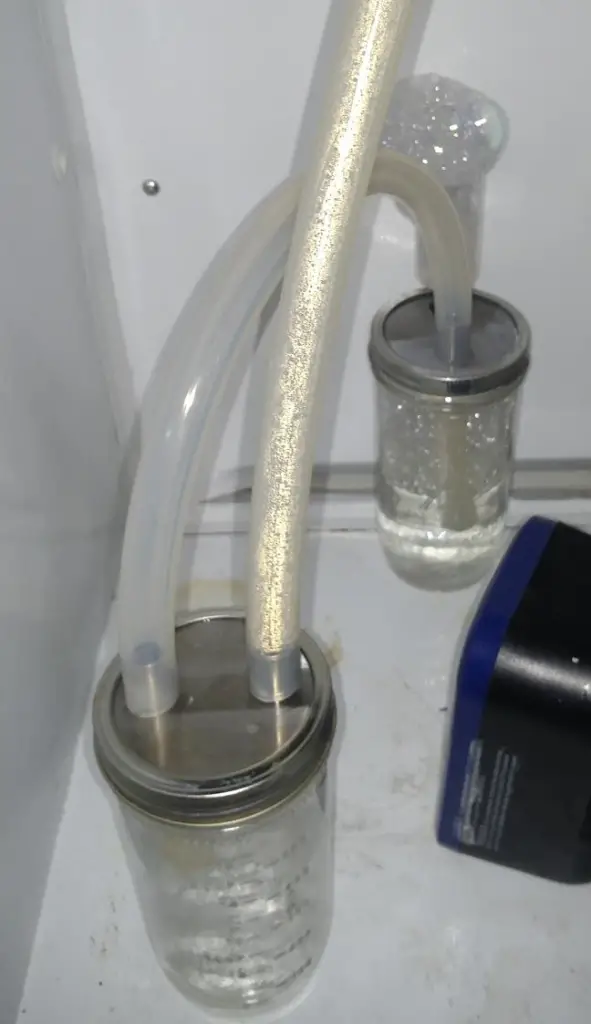
The basic premise of each of these solutions seems to be daisy-chaining your blowoff tubes to capture CO2 for cold crashing while venting any excess to prevent too much buildup of pressure.
I have provided an image you can see what I’m talking about, but I will attempt to explain the method here as well. I’ll also try to do it myself and add a video here at some point showing you exactly how it can be done.
You’ll need two containers in addition to your fermenting vessel (these can be whatever standard container you’d usually use as part of a blowoff system – a mason jar works well, and is what I usually use). One of these containers will also need a sealable lid. Additionally, you’ll need two lines of siphon tubing instead of one – we’re effectively daisy chaining a second blowoff tube system to the first.
Note that you may want to wait to set this up until after the most vigorous part of fermentation, but obviously while fermentation is still occurring. You want to capture the CO2 that’s being put off from the yeast, but none of the krausen or yeast sediment if possible.
1. Run a blowoff tube from your fermenting vessel into a sealed container
For one of your containers (mason jar or otherwise), make sure you have a lid.
Into this lid, you’ll want to drill two holes just big enough for your siphon tubes to fit into. They should be snug, and the container should be airtight once the tubes are inserted (except, obviously, air entering or escaping through the tubes).
Rubber grommets can be used to ensure a snug fit, but if you get the holes right, you may not need them.
The first part of the system is to now run one of the lines of tubing from your fermenting vessel (through the airlock hole/bunghole) into one of these holes in the container’s lid that you’re using.
This bit of tubing should only poke just barely past the lid and into the container. You’ll be adding Star-San or some other liquid in the next step to create a blowoff system, but unlike with a standard blowoff system, you don’t want this bit of tubing to be submerged in the liquid.
2. Add a bit of Star-San or some other sanitary liquid to the container
Use whatever kind of liquid you’d usually use for a blowoff system and add just a little bit to the container. This liquid will eventually be pushed into the third container, but you’ll want to both create some pressure and sanitize the intermediary jar.
3. Run the second tube from the sealed container into the remaining container.
Insert your second bit of tubing into the hole you made in your container’s lid and seal the container. Make sure that this tube gets submerged in your liquid.
Then, run the other end of the tube into your second jar. This jar should remain open to the outside air, and your tube should be able to rest gently on the bottom of the jar.
Seal up the intermediary jar (with the liquid in it) and let it do its thing!
CO2 will be produced by the fermentation process, and be forced up through the first bit of tubing into the intermediary jar.
Since this first bit of tubing is not submerged, it’ll push gas into the headspace of the sealed jar. The headspace will fill up with CO2, and once pressure begins to build, it’ll exert that pressure onto the liquid at the bottom of the jar.
This will push the liquid up the second tube (which is submerged) and across into the other jar, where it will remain for the rest of the process.
Since this jar is open to the environment, no pressure should build. Gas will now come out through the tube, and when the pressure builds up enough, it’ll force it through the liquid in the form of bubbles.
This is basically just a blowoff tube with extra steps.
But thanks to those extra steps, your intermediary jar is now filled up with CO2, ready to be used by you at a later time!
4. Put this entire system, fermenter and jars and all, into your refrigerator for cold crashing
When fermentation is complete and you are ready to cold crash your brew, you will want to put this entire system into the refrigerator.
When the temperature of your brew drops, the liquid and gas condense, and a vacuum is formed, suckback will occur. But now, you’ve given it something safe to suck in!
The CO2 in the middle jar will get sucked back in through the tube, filling the headspace of the fermenting vessel.
The Star-San (or other liquid) that was used to keep out the ambient air will get sucked through the second line of tubing and end up in the middle jar, safely away from your brew. In this jar, it will still act as a barrier to the outside air, protecting your brew from contamination and oxidation.
It is important that you use big enough jars. If the middle jar is too small, and not enough CO2 is captured, suckback won’t stop just because the middle jar runs out of air. It’ll keep sucking in, and could potentially pull in the liquid as well as the outside air!
Conclusion
So it turns out, the only way to cold crash without it resulting in suckback and ruining your batch and/or your equipment is to use a pressurized system.
However, this doesn’t mean you need to go out and purchase an expensive, pressure-ready fermenting vessel!
If you want to cold crash, there’s a number of options, from ready-made products you can buy to DIY solutions, with varying levels of cost and difficulty.

