I recently went over the various ways to harvest yeast for reuse. Before my next brew day (a pseudo-lager!) I’m hoping to overbuild a Lutra Kveik yeast starter and keep a culture of that yeast strain on-hand for many brews in the foreseeable future. But harvesting aside, what about storage? How do we actually keep the yeast alive and healthy between brew days?
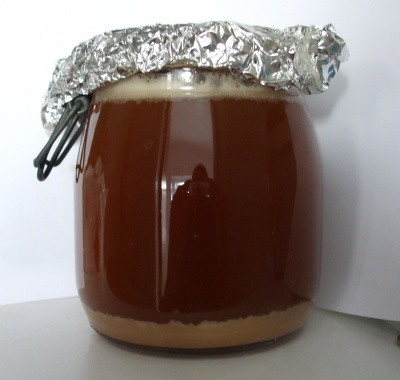
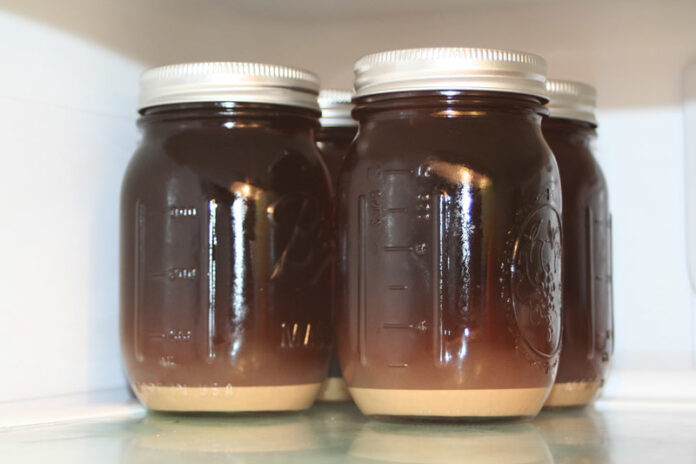
After harvesting, make a yeast starter for growth and health. Once the starter is done, the culture can be stored under the starter “beer.” Yeast cultures should be kept refrigerated, as close to 32-34°F as possible, and can be kept this way for 4-6 months. Additional maintenance can keep the yeast going indefinitely.
If you’ve harvested your yeast via top cropping (and you have foamy white krausen in a jar now) and you intend on reusing it immediately (within hours or days of harvest) then you do not need to do anything special for storage. Simply keep the krausen in a sanitized container until use, and pitch it right into the next batch.
Yeast rinsing requires a starter before pitching into a new batch, and overbuilding obviously involves making a starter as part of the process.
If you intend to store your yeast culture long-term, as I am planning on doing with the Lutra Kveik strain, then it requires a little more to ensure that your yeast remain happy and healthy throughout storage time.
The goals for storing your yeast long-term (and still having them produce exceptional brews even after storage) are:
- Get them into hibernation quickly. You want them to go dormant before they begin eating through their glycogen reserves and using up all of the nutrient in their environment – if they start doing that, they start dying!
- Keep your yeast happy and healthy. You want to have a high-enough viable yeast cell count when you go to use the yeast again – at least enough that you can build the count back up to a useful number. You also want your yeast to have healthy glycogen reserves (this keeps them healthy through hibernation and helps them build their numbers up faster once they wake up) and you want them to have strong, healthy cell walls.
Storing Your Harvested Yeast: Step-by-Step
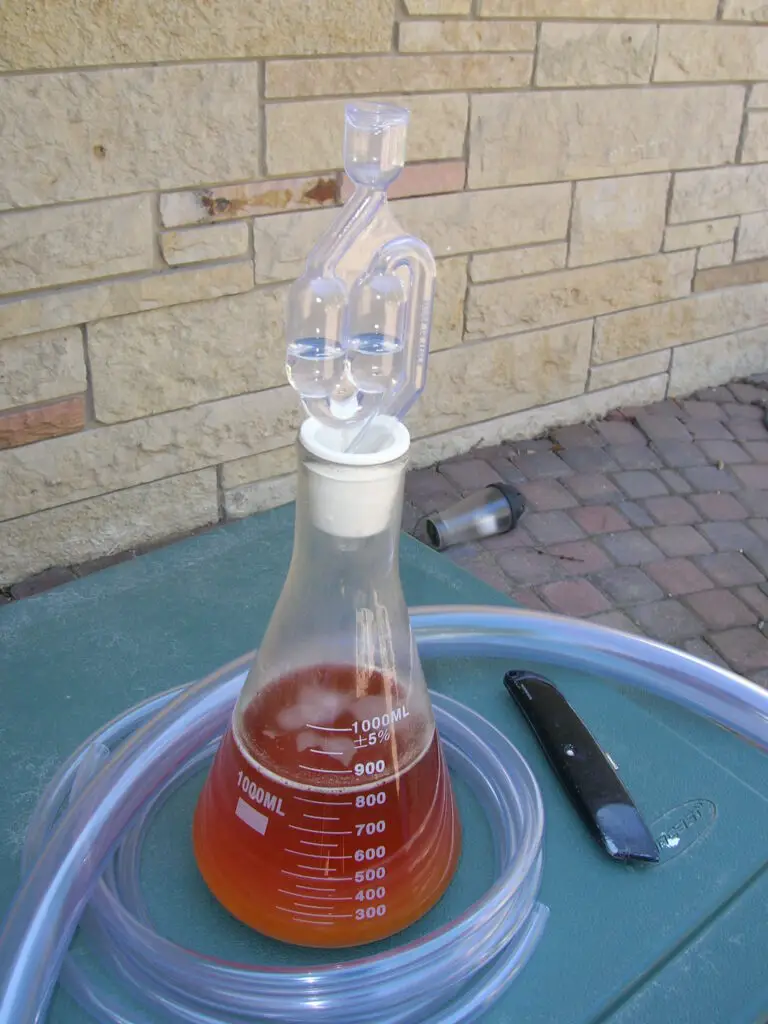
- Make a Yeast Starter. When harvesting, you probably did not collect a ton of viable yeast cells. You can probably get by just by storing what you’ve got, but it doesn’t hurt to make a yeast starter and let it run for a time to build up a culture of healthy, happy yeast cells before putting them into dormancy. For this purpose, concentrated wort is best (fruit juices and honey do not have as many nutrients and ferment to an even lower pH). Neutral flavors like pale or pilsen malt extract are best, just in case some gets into your next batch.
- Store in a small container at 32-34°F. Any small, sealable container will do – mason jars work great for this. Once your starter is close to completion, you’ll want to get the yeast slurry cooled in the refrigerator, and leave it there when you’re not using it! The colder the better (so all of the yeast hibernate and don’t remain active), but avoid freezing the solution – ice crystals will rupture the cell walls and kill off your yeast!
- Store the yeast culture in beer, not in water. I’ll dive into this more below, but the typical recommendation is to store your yeast in sterile water – this is wrong, and is bad for the yeast! You will want to store your yeast in a beer-like solution (what’s produced from your starter is just fine) as that is the best environment for them, keeps them happier, and helps prevent contamination.
- Yeast cultures can be stored this way for up to 4 to 6 months. Obviously, shorter is better. Some brewers have been able to rouse yeast after over a year, but I wouldn’t push it, personally. The longer the yeast remain in storage, more cells will die off, leaving fewer and fewer viable cells to build the colony back up when it comes time to brew a new batch.
- Additional maintenance can keep them healthy and happy longer – even indefinitely! Yeast cells will die off over time, but you can replace them. Maintenance of a yeast culture reminds me of sourdough starters – with some effort, people have been able to keep those around for generations, passing them on to their children! You can treat your harvested yeast culture the same way, feeding it every so often to build up the cell count when it has been in storage for a long time.
Should You Store Your Yeast in Sterile Water or Beer?
After performing a yeast rinsing to harvest yeast, the advice has, for a very long time, been to store the yeast slurry in a solution of completely sterile water – water that has been first boiled, then cooled back down to a temperature that is comfortable for the yeast. This advice is incorrect, and is actually harmful for your yeast culture.

You should always store your yeast slurry in a “beer”-like solution. The “beer” produced from your yeast starter will work just fine. The environment that the yeast creates from the concentrated wort is best for the yeast’s health and will also help to prevent contamination.
The advice to use sterilized water is another one of those “tribal knowledge” things. It has been passed around without question for many years, and brewers who do not know better will often simply take the advice at face-value.
The suggestion actually originated from research intended to figure out ways to store yeast long-term in places like Africa where refrigeration was not readily available. They found a viable method of storage, but it required removal of ALL TRACES of organic matter from the water via centrifuge – the water has to be truly sterile. This is obviously not a reasonable expectation for homebrewers.
The many yeast experts at White Labs, Fermentis, and others have publicly stated that this is not the optimal method of storage:
In case of repitching, yeast must not be stored out of beer for long periods, even at low temperatures, as yeast glycogen levels will fall causing slow fermentations.
– Fermentis’ parent company, Lesaffre
White Labs has had mixed success with sterile water storage, so time will tell if this procedure will work for craft breweries
– Chris White, White Labs
Many homebrewers who know better have actually had success harvesting a yeast slurry from sediment in the fermenting vessel after primary fermentation, storing it in the beer that the yeast itself fermented – performing no amount of yeast rinsing or otherwise!
(I would suggest other methods of yeast harvesting, as mentioned in the previous article – but this is very telling!)
Why Beer?
We, as homebrewers, have a lot more information available to us these days to help us determine actual best practices – rather than just doing what’s always been done.
We know that, through fermentation, yeast creates a sort of “force field” around itself – a protective environment that allows the yeast to thrive while killing off nearly every other microorganism.
By creating beer, mead, or wine, the yeast creates a foothold that allows itself to outcompete any other microorganisms in the solution. Alcohol kills most things, and the very acidic (low pH) environment prevents anything else from growing.
So why beer, though, specifically? Why is it recommended to use a neutral wort instead of fruit, honey, or even plain sugar?
Well, malted grain – and thus the wort we make with it – has a ton more nutrients for the yeast, most importantly nitrogen. This allows the yeast cells to divide and grow, and thus the yeast culture to grow, in a much healthier (and less-stressed) way.
By storing your yeast in “beer”, you’re giving your yeast the best chance to thrive, and thus create the best brews when you re-pitch the culture in the future.
(I put “beer” in quotes because you actually shouldn’t store the yeast in true beer if you can help it – your yeast culture is better off in a “beer-like” solution made from pure wort. I would suggest creating a neutral-flavored solution from something like pale or pilsen malt extract. You can just make your starter this way, and then store your yeast in the “beer” produced from it.)
How Long Can You Store a Harvested Yeast Culture?
Once you have created the perfect environment for your yeast culture to survive in long-term storage, you do need to be aware of just how long they will survive – without your intervention, at least.
At temperatures close to 32°F, a healthy slurry will not start to see reduction in viability until it runs out of glycogen, etc. 10-20% reduction in viable cell count for each month the slurry is in storage is common. While brewers have been able to reuse yeast after longer periods, four to six months is a safe bet.
While I have read on forums and such that some brewers have been able to wake up their yeast (and get a healthy colony going) after over a year in storage, I wouldn’t count on it.
To be safe, I would suggest only leaving your yeast alone in refrigeration for up to 4-6 months. Even then, shorter periods are better.
Yeast Culture Maintenance
Of course, this 4 to 6 month suggestion is for yeast cultures left unattended. You can absolutely do more to take care of your yeast, and ensure that the culture lives long and happy.
Theoretically, with a bit of periodic maintenance, you can keep your harvested yeast indefinitely!
The issue with a yeast culture’s longevity, of course, is that the cells will die off over time. As the yeast remains in storage for longer periods, more cells die off.
So then, the solution is obvious: every so often, you will need to grow the culture back up to a viable cell count – replacing the dead yeast with new, healthy cells!
The concept is very similar to that of maintaining a sourdough starter. After all, it’s all just yeast, right?
The best way to keep your yeast culture alive and happy for extended periods of time is to periodically feed them. Just make another starter every so often! You can simply take your yeast culture out of refrigeration and add more concentrated wort to the solution, then give your yeast some time at room temperature to feed on the sugars and produce more yeast cells.
I would suggest, every so often, draining some of the liquid and replacing it with an entirely new starter solution. This will keep it from getting too alcoholic (which can, at higher gravities, start to be very detrimental to your yeast), as well as keeping the volume down to a level that’s easier to store.
You will likely want to make a new starter and grow your yeast cell count back up every 3 to 6 months that the yeast is in storage and not being used.
Using Your Yeast for Brewing After Long-Term Storage
Of course, the goal in storing a yeast culture for any period of time is obviously to use it again in a future batch.
When you have harvested yeast from a previous batch (whether by yeast rinsing, top cropping, or overbuilding a starter) and stored it for a period of time, simply make a new yeast starter and pitch the yeast as you would if it were a commercially-purchased liquid yeast.
After your yeast culture has been in its dormant state for a long period of time, you will want to wake the yeast up and prepare them for fermentation before just pitching the slurry into the next batch.
You should treat your yeast culture as if it was liquid yeast that you purchased. You’ll likely want to build up the viable cell count to a level that allows them to happily ferment away without getting too stressed.

The recommended pitching rate for any yeast is 6 million cells per milliliter of standard-gravity brew. For a 5 gallon batch at standard gravity (<1.060 SG) this works out to about 113.5 billion cells. For bigger brews with higher original gravities, you should pitch more yeast.
There are ways for homebrewers to estimate yeast cell count in solution, which I will expand upon in future articles. You can also just rely on one of the many online calculators which will give you the information.
What it all comes down to, however, is this: make a simple starter (again) as you would if you had purchased the yeast in liquid form. This will wake your yeast up, help your culture grow up to a healthy viable cell count, and prepare the yeast for its job.
How Often Can You Reuse the Same Yeast?
Getting more batches, and thus more beverages, out of a single purchase of commercial yeast is the key to keeping your brewing costs down. But just how many batches can you brew from a single yeast culture?
Technically, brewer’s yeast does not go bad from reuse. You could use the same yeast culture for homebrew forever. However, due to genetic drift, after as few as 4-6 uses, the yeast may not express the same characteristics you originally purchased it for. Reusing from a single starter can reduce genetic drift.
Yeast actually love fermenting for us – they thrive in it. By providing the yeast with wort or must, we are giving them plenty of food for the culture to grow and produce many happy, healthy yeast cells.
(Of course, there’s more to it than just wort or must – oxygen levels, nutrients, and many other things are also good for helping the yeast and not stressing them out)
Each successive batch of beer, mead, or wine is little more than a really big starter to the yeast. If you were to keep providing the yeast culture with more oxygen, sugar, and nutrients, they would happily keep fermenting and growing forever.
(Note that this is basically what we do if we were to rack the brew off of the yeast sediment and then pitch that yeast into a new batch of wort or must)
However, over time, as the yeast reproduce so many times in a fermentation, the traits that they were selectively bred for can slowly change. From one batch to the next, these changes are likely to be minimal – when reusing the same yeast for a new batch, you’ll likely see similar results. Any genetic drift would not be noticeable.
After a few times reusing the yeast, however, its characteristics can start to really change – sometimes drastically!
This might result in new traits that you actually enjoy – or it might be so far from what you intended that it makes you unhappy.
That’s why it’s often recommended to only use the yeast rinsing method to harvest and reuse the same strain of yeast a few times. Eventually, you’re not really working with the same yeast anymore, and the results can be unpredictable.
However, by overbuilding your initial starter, and simply pitching yeast from that first yeast starter with each successive batch, you’re cutting down on yeast reproduction in between batches. With fewer generations, there are fewer opportunities for genetic drift.
Some brewers have used the same yeast more than ten times without any noticeable changes in character!
Conclusion
By harvesting and reusing yeast, you can really save a ton of money on this hobby, and produce some really great beer, mead, and wine for far cheaper than you can find at the store.
With proper harvesting and storage techniques, you can really take full advantage of this – having yeast ready to go for many batches.
I’m really glad that I took the time to research this subject, too, before I went ahead and jumped right in with the Lutra Kveik strain that I’m trying to save. There’s so much tribal knowledge that’s been passed around, and it’s important that we get the word out and show homebrewers (new and veteran alike) the actual best practices for storing and reusing yeast!
Hopefully this was as enlightening for you as it was for me.


